A full-coverage foundation routine can even out redness, soften the appearance of blemishes, and give the rest of your makeup a smooth starting point. The trick is building coverage where you need it while keeping the layers thin enough to move comfortably with your face. A flawless-looking finish still has real skin texture; it does not need to look like a mask.
This routine keeps my original order: prime, conceal, apply foundation, set with powder, and finish with setting spray. If you prefer a lighter base, swap the foundation for a tinted moisturizer or BB cream and keep concealer focused on individual areas. For fuller coverage, follow the steps below and resist the urge to apply everything at once.
Start with skin that feels comfortable
Cleanse gently, then apply a moisturizer suited to how your skin feels that day. Give dry patches a little extra attention around the nose and mouth, but avoid leaving a thick layer of cream sitting on the surface. Foundation tends to slide over that residue rather than settle evenly. Let your skincare absorb before starting makeup.
For daytime, apply sunscreen as directed on its label before your makeup. Foundation with SPF is not a reason to skip that step. Let the sunscreen settle, then check your skin with clean fingertips: it should feel comfortable rather than wet or slippery. If products roll into little flakes, stop rubbing and simplify the layers before adding foundation.
First, prime with a light hand
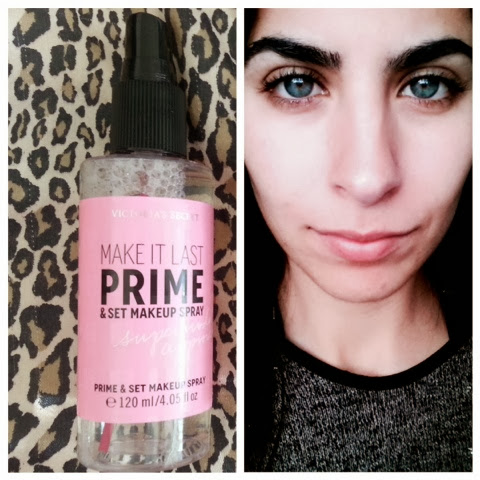
Priming was the first step in my original routine, and a spray can make it easy to remember. Check the bottle before using one: a setting spray is not automatically intended for use as a primer. If yours is labeled for both, apply it according to its instructions and let it dry before moving on.
You can also use a small amount of cream or gel primer only where it helps. Press a little over an oily T-zone or an area where makeup tends to wear away. You do not have to coat your whole face. Keep richer, hydrating products on drier areas and avoid piling several primers on top of each other. If foundation already sits well over your skincare, primer can be optional.
Second, conceal the areas that need a head start
My original routine used MAC Studio Finish Concealer before foundation. You can follow that approach with a concealer you already like, especially for a few concentrated marks. Choose a shade close to your skin tone for blemishes; a noticeably lighter shade can draw attention to a raised spot instead of disguising it.
Pick up a tiny amount with a clean, small brush and tap it onto the discoloration. Blend the edges while keeping most of the coverage in the center. Let it settle briefly before applying foundation over it. For under-eyes, start with less product than you think you need and place it mainly where you see darkness, rather than covering the entire area in a thick triangle.
Stippling means using small pressing or tapping motions. It is useful here because sweeping back and forth can move the concealer away from the spot. Fingers are not forbidden: clean fingers can gently press product into place. A small brush simply offers more control, while a sponge helps soften edges. Whichever tool you choose, keep it clean and use light pressure.
Third, build your foundation in thin layers
The original look featured Make Up For Ever HD foundation and a Sonia Kashuk brush. The useful takeaway is the application method, rather than a particular bottle or tool. Choose a foundation whose finish suits your skin and test the shade along your jaw in daylight. Compare it with your neck and exposed chest before committing to a full face.
Dispense a small amount onto a clean palette or the back of a freshly washed hand. Pump sizes and formulas vary, so there is no universal number of pumps for full coverage. Start with a little, then add more only after you can see what the first layer covers.
- Place small dots around the center of the face, where you want the most evening out.
- Use a brush to stipple the product outward across the cheeks, forehead, and chin.
- Use the remaining product around the hairline and jaw so those edges stay thin.
- Check the sides of the nose, between the brows, and around the mouth for buildup.
- Press a clean, barely damp makeup sponge over visible brush marks if needed.
A damp sponge should feel soft, not drip water. Squeeze it thoroughly before use. Press and lift instead of dragging it over the skin, especially where you already placed concealer. Allow the first layer to settle, then assess your face in good light. If only a couple of marks remain visible, touch those up with concealer instead of adding another coat everywhere.
Do not neglect the jawline, but do not rely on painting your entire neck to fix the wrong shade. Blend the edge carefully toward the neck and around the ears if they are exposed. A suitable shade should transition naturally. Check this before putting on a pale blouse or close-fitting collar, since excess foundation along the neck can transfer onto fabric.
Fourth, set without making the base look heavy
Give foundation a moment to settle, then look for any product gathered in expression lines. Gently tap those areas smooth before powdering. Powder can hold a crease in place if you apply it over makeup that has already collected there.
My original routine used MAC pressed powder, but choose the powder shade and finish for your own base. A tinted powder can add coverage, so apply it sparingly. Pick up a little with a soft brush, tap off the excess, and press lightly around the nose, forehead, and chin. Leave comfortable, less shiny areas alone if they do not need setting.
Under the eyes, use only a small amount where concealer tends to move. Avoid repeatedly dusting powder over dry patches. If the finish looks too powdery, gently press with your sponge before adding anything else. More product is rarely the first fix.
Finish with spray and a final check
If you enjoy setting spray, use it at the stage recommended on its label. Some fit after the base, while others work best once the rest of your makeup is complete. Follow the directions for distance, close your eyes and mouth, and let the mist dry without touching your face. A light application is enough; soaking the base can leave droplets or disturb coverage.
Before heading out, check your makeup near a window. Turn your head to inspect the jaw, hairline, and sides of the nose. Finish blush, brows, and the rest of your look, then give everything time to settle before pulling clothing over your head. When possible, put on a narrow-neck top before applying makeup and protect its neckline with a clean towel.
Touch up only what has changed
Later, blot excess shine with a tissue or blotting paper before reaching for powder. Press gently instead of rubbing. If foundation has separated around your nose, soften the uneven edge with a clean sponge and add a tiny amount of coverage only if needed. Layering powder over oil and broken-up foundation can make the area look thicker.
The best part of this routine is its flexibility: a little targeted concealer, thin foundation layers, and selective setting can create a polished full-coverage look without covering every area equally. At the end of the day, remove your makeup gently and clean your tools regularly so they are ready for the next application.